Dear Nail Diary,
As promised here is the first of my Holoday Nails, before I do my Mom's and potentially ruin them. Also if you want to get technical there isn't actually any holo in this design, only iridescence and sparklies. I was desperate to try my new candy cane stripe vinyls - now they are holo! I started off with a base of Barry M - Lady. It's a textured polish, but a couple coats of SV sorted that out. I then applied the vinyls and painted on Nails Inc - St James. I was just going to leave it there but there seemed to be something missing...
More sparkle! So I glued on some square rhinestones and added another coat of SV. However it still wasn't enough...
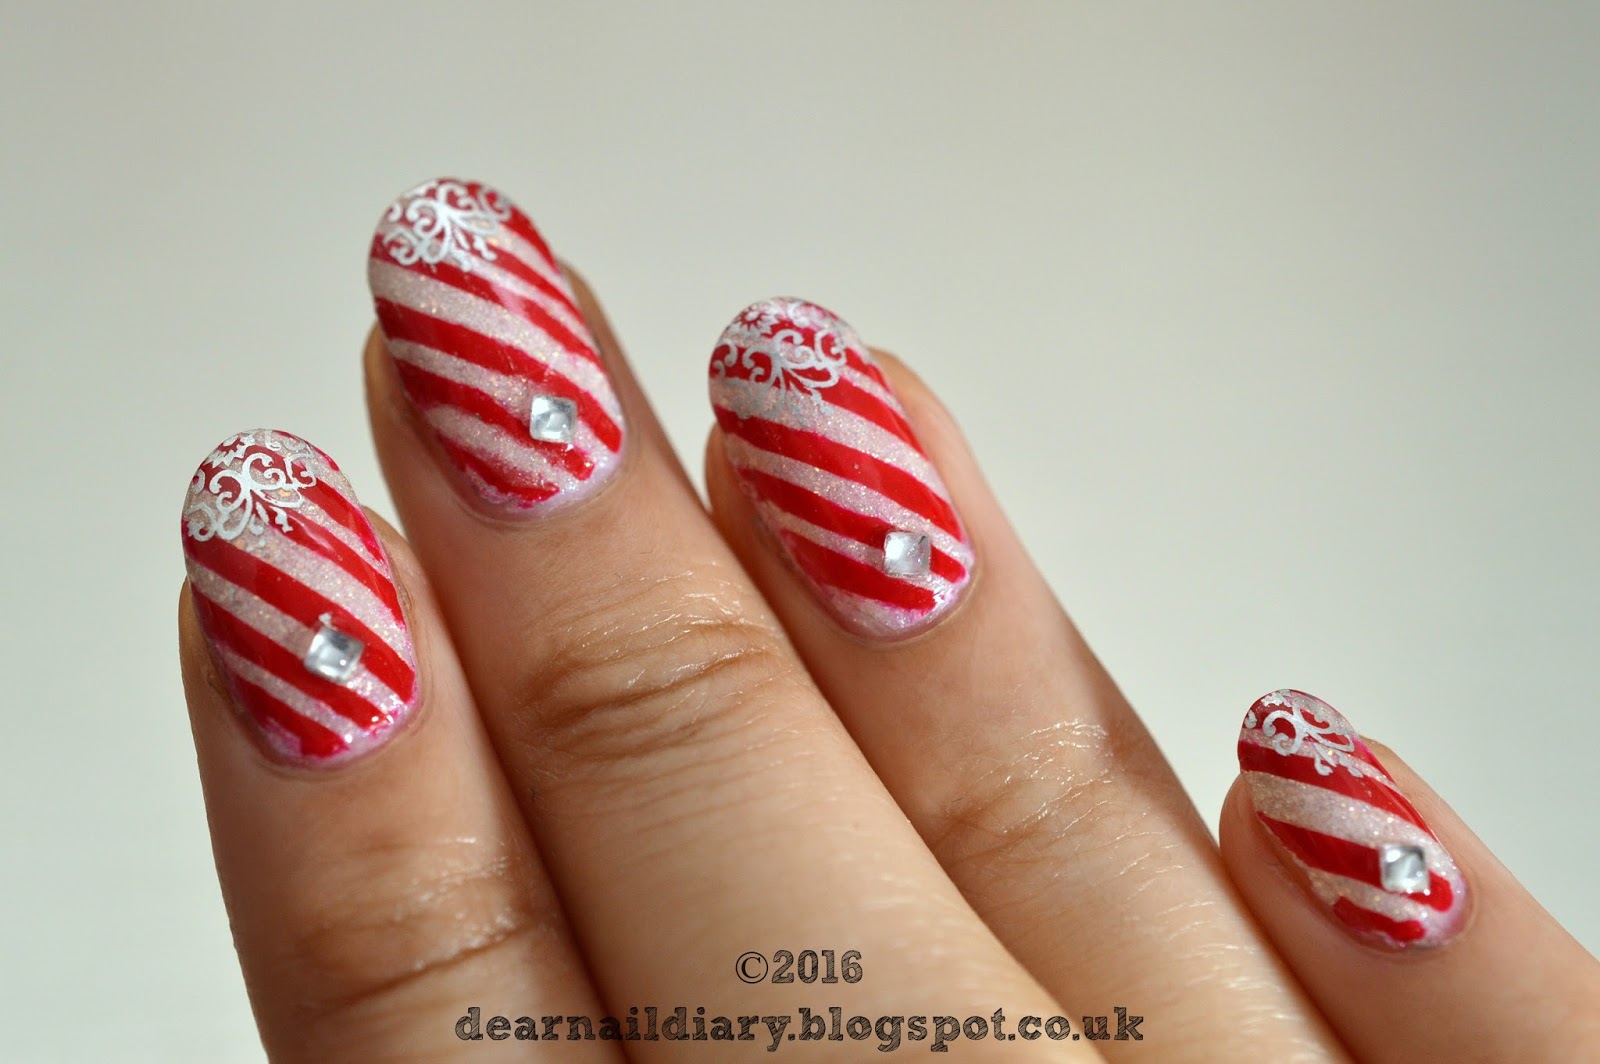
So lastly I stamped a filigree style design on the tips of my nails using China Glaze - I'd Melt For You and added a final couple of coats of SV. It's been a couple of days and I'm impressed I haven't lost any rhinestones yet as I've usually lost at least one an hour after I've done my nails.
I'll be back when I've done my Mom's nails as I forgot to take a photo of the design I last did for her.
=:x
Monday, 12 December 2016
Sunday, 11 December 2016
George and the Dragon
Dear Nail Diary,
I apologise if the nail art is looking a little worse for wear in these photos, I've been meaning to take pictures for a few days, but I've been too ill to take them. Yesterday however, one chipped completely off the nail on my other hand so I thought I'd better get a photo while I still can.
I love the two green holo polishes from A England - Saint George and Dragon and I wanted to build a design around them. I started off with this Dragon Scale Triple Gradient tutorial from Simply Nailogical:-
It was the first time I've tried a scaled gradient and while it ccame out okay, it seemed pretty basic just on it's own, so I decided to add some elements. Using a dragon vinyl from Twinkled T's Mythical Creatures collection, I painted it using Nails Inc's red/orange duochrome glitter polish - New Burlington Place. On my next three fingers I stamped a fiery looking tribal stamp with an orangey/gold shimmer polish from Avon that I've had for ages. I also painted a light coat of China Glaze's Golden Enchantment on top of the flames. Duochrome dragons breathe golden holo fire, don't you know? ;)
Wouldn't you know my camera died just before I could take this last photo, so I had to take it with my tablet. My thumb is what my duochrome dragon is protecting - its treasure room. I did a quick glitter gradient using OPI/Gwen Stefani - Don't Speak and a thin layer of the golden holo on top.
Next time I'll have photos of the first of my Holoday nails!
=:x
Labels:
A England,
Avon,
Bundle Monster,
China Glaze,
glitter,
gold,
gradient,
green,
holographic,
multichrome,
nail art,
Nails Inc,
OPI,
orange,
red,
Simply Nailogical,
stamping,
Twinkled T,
vinyls
Thursday, 8 December 2016
Furry Fail
Dear Nail Diary,
I forgot I hadn't posted this. I recently bought some nail vinyls from Twinkled T (among other things) and was desperate to try this idea I'd had to honour my cat who died a couple of months ago. Cristine from Simply Nailogical has these cat cyclone vinyls and I wanted to see how they'd look combined with the flocking powder I got from Bundle Monster. I imagined a really cool texture effect between the A England polish I'd chosen and the furriness of the powder, however the end result wasn't as impressive.
I think it would have been better if I'd used nail glue or top coat instead of clear polish to adhere the flocking powder. Also it was obvious right away that I needed a more striking colour of powder if it wasn't going to create the effect I wanted.
I changed to a purple, however that just seemed to emphasize how badly the powder wasn't sticking. The last time I used the flocking powder it worked really well, but I think that was because I was applying to my entire nail. I tried a vinyl with a gold holo glitter just to make sure it wasn't my lack of skills with vinyls that was failing me - as you can see, that wasn't the case.
It worked slightly better on my right hand which I did second, so maybe I just need to practice this technique a bit more?
=:x
Friday, 11 November 2016
Back From the Dead
Dear Nail Diary,
Hallelujah, I'm back into nail art again. I've been in a bit of a slump lately, plus I've been immersed in a jewellery collection I'm currently making/designing and I just haven't been in the mood to have pretty nails. After skulking around the internet I discovered Simply Nailogical on YouTube and fell in love with her style. BTW, I am a confirmed Holosexual - check out her videos to find out what that means! Anyway, I've been so blown away by how far nail art has come in the time I've been away, that I couldn't resist any longer.
So here's what I've been wearing the past week on my nails, while I wait for some new nail art goodies to come from 'Merca...
I'm loving how much more intricate and cool vinyls have become, so before I get the ones I've just ordered from Twinkled T, I made do with some cheap Christmas border stickers I had lying around. I picked up two random colours from my stash: China Glaze - Define Good and Nails Inc - Lanesborough Place.
I'm really pleased with how it came out, considering being nail vinyls are not these stickers' intended purpose. The Seche Vite topcoat kind of dragged the design a bit, but other than that it would be a pretty cool look for Christmas I suppose.
=:x
Friday, 22 May 2015
Turquoise Ombre + Polish Haul
Dear Nail Diary,
Long time no see again. I still haven't been in the blogging mood until just recently. Plus every time I had blog-worthy nails, I forgot to take photos of them! I've just had a huge polish haul (which you can read about after the jump,) and as I was swatching them, I saw this cool sort of ombre effect develop - so I decided to apply it to my nails.
The lightest is two coats of Nails Inc's Swan Street, which is from their The New White collection. Next two coats of Nails Inc's Belsize Lane, then Ciatè's Pepperminty and Maybelline's Turquoise Lagoon. On my thumb is Ciatè's Headliner.
Labels:
Birchbox,
Ciate,
Essie,
haul,
Nails Inc,
new goodies,
ombre,
Orly,
Rimmel,
teal,
turquoise,
WAH London
Saturday, 11 April 2015
Lola Barcelona Free Sample Swatches
Dear Nail Diary,
I've been a subscriber to Birchbox for 4 months now. This month I received a free sample of Lola Barcelona nail polish. It's an orangey coral colour called Rambla. It's not a colour I would have picked for myself, but it looks rather nice - very Summery. My mom also subscribes and she received a dark pink called Gracia. Again not a shade either of us would have chosen.
Labels:
Birchbox,
haul,
Lola Barcelona,
orange,
pink,
reviews,
Seche Vite,
summer,
swatches
Sunday, 5 April 2015
Happy Easter!
Dear Nail Diary,
I'm sorry I haven't posted in a while, but real-life issues have meant I haven't really been in the mood to do anything with my nails. I thought I'd ease myself in slowly, as X99 is currently taking up all of my time. I have a new camera (my first DSLR - a Nikon D3200) so I've been retaking photos of all my jewellery so it looks more professional. I'm still learning all the features, so I thought I'd test it out on taking photos of my nails first.
Labels:
Barry M,
blue,
China Glaze,
Easter,
green,
Nails Inc,
pastel,
pink,
Pueen Plates,
Seche Vite,
Spring,
stamping,
white
Thursday, 1 January 2015
Happy New Year!
Dear Nail Diary,
This is only going to be a quick photo post, which I'll add details to later, but I thought you'd like to see the nails I was rocking last night.
Labels:
Barry M,
black,
China Glaze,
decals,
foil,
glitter,
gold,
multicolour,
nail art,
Nails Inc,
OPI,
Pueen Plates,
silver,
splatter,
stamping,
stickers
Tuesday, 23 December 2014
Christmas Nails
Merry Christmas!
I thought I'd show you some of the nail designs I've been doing in the run up to Christmas.
This is the Gift Wrapped design I did for my mom.
I started out with two coats of China Glaze's Tip Your Hat from the Twinkle Collection. Using gold sticker stripes and a gold bow, I created the gift design on the middle finger. On the index and ring fingers I added glitter stars.
Recently I did this Christmas design, inspired by various designs I saw over the internet.
On the thumb, index and baby fingers, I painted two coats of Rimmel's Block Your Green. Then on the middle and ring fingers I painted a two coat base of China Glaze's White On White.
On the middle fingers I applied striping tape in a diagonal pattern, painted London Girl's 149 on top and carefully removed the tape to create this candy cane effect.
For the ring fingers, I applied tape in an inverted "V" and began dotting various sizes with the London Girl and the Rimmel to make a tree and placed a star sticker on the top before sealing it with a top coat of Seche Vite.
My own mani was inspired by a candle created by my friend Maryann over at One Stop Pamper. I'm not sure if she still makes it, but it smelt like peppermint. It had these glitter particles in it, so it not only looked, but smelt like fresh snow.
Two coats of China Glaze's White On White and then a coat of Butter London's Frilly Knickers to create the snow effect. On my thumb and baby fingers I did a glitter gradient with China Glaze's De-Light from the Twinkle Collection. On the rest, I painted on Nails Inc's Diamond Arcade and sealed it with Seche Vite.
I may do another mani for Christmas Day, if I do, it will probably posted after the day itself. It I don't, have an awesome December 25th, whatever you may be doing that day!
=:x
Labels:
Butter London,
China Glaze,
decals,
dots,
dotting,
glitter,
gold,
green,
holographic,
London Girl,
nail art,
Nails Inc,
red,
Rimmel,
silver,
stickers,
stripes,
tape,
Twinkle Collection 2014
Monday, 24 November 2014
Polish Haul
Dear Nail Diary,
Sorry this post is a bit late, but I've been busy updating X99 and making jewellery and Christmas decorations.
Today I've decided to share my latest additions to my polish collection, as jewellery making isn't really conducive to a neat manicure! I'm currently wearing my chipped polish from last Monday - terrible, I know. :(
Warning: Photo heavy post!
Labels:
Barry M,
Butter London,
China Glaze,
Cuccio,
haul,
Models Own,
new goodies,
OPI
Subscribe to:
Posts (Atom)


.jpg)


.jpg)
.jpg)
.jpg)

.png)